Feeds:
Posts
Comments

Archive for the ‘Finished Objects’ Category

Little squares quilt

You may (or may not!) remember a post I made a few weeks ago, about a cushion I’d made using a new-to-me method of piecing small squares accurately, using iron-on facing – the tutorial I used can be found here. The tutorial talks of facing with a 2” grid marked on it, and I eventually managed to track some down in the UK, which wasn’t easy, as not many places stock it, and then had a play with it.

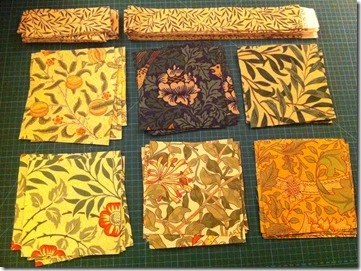
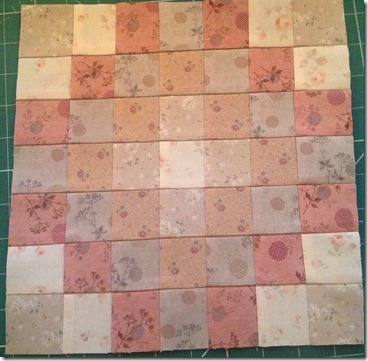
I found five fat quarters from the same range in my stash, and cut them into lots of 2” squares, then started making layouts of 7 x 7 squares (that being the width of my ironing board, so easy to do…!)

photo-1

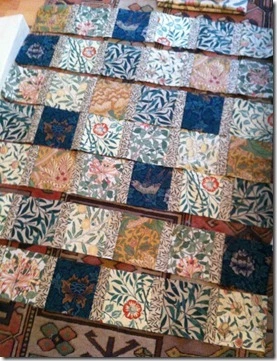
I completely failed at taking any sort of progress shots, this is the only one I managed, of the first square. This time I didn’t trim the seams and iron them flat, I simply pressed them to one side, then sewed the seams in the other direction, so there’s only twelve seams per block. You can see the lines of the seams a bit, but that would be eased by making the squares ever so slightly less than 2”, as in places they overlap, which adds bulk to the fold of the seam. I’ll try and remember for next time!

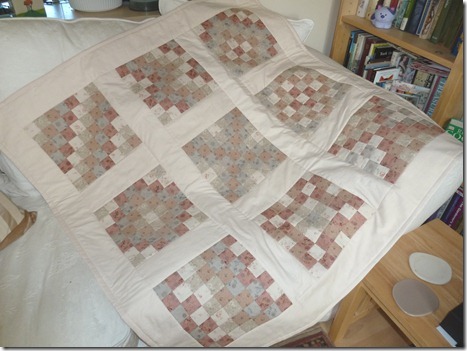
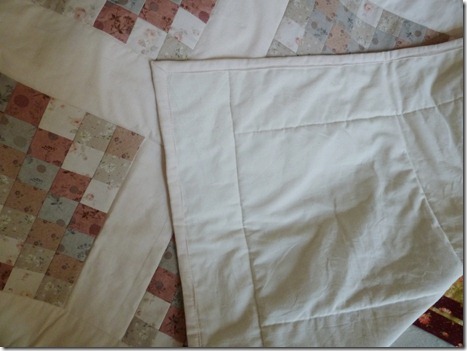
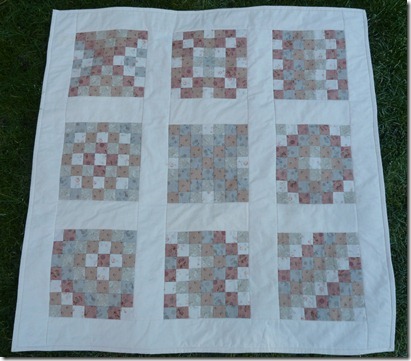
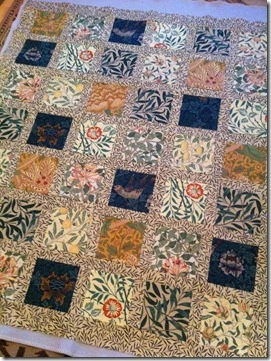
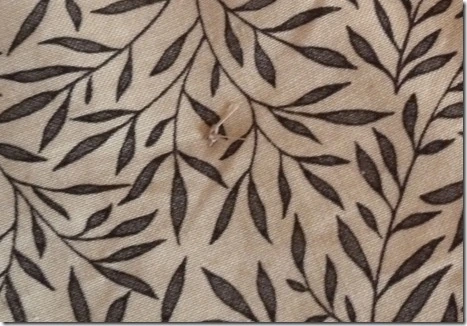
So I made nine blocks, then found an old duvet cover and cut strips of it to make sashing and binding, before backing it with calico for cheapness sake – this was really only me seeing how the blocks behaved in a quilt. With hindsight I’d have been better off using quilting fabric for the sashing, the duvet cover is pure cotton, but it had been washed quite a few times, so it’s lovely and soft, and contrasts rather too much with the stiffer blocks. But it’s not bad, I’d use this method again for quickness and accuracy.

P1040478

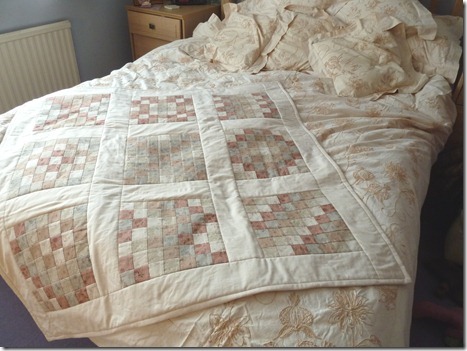
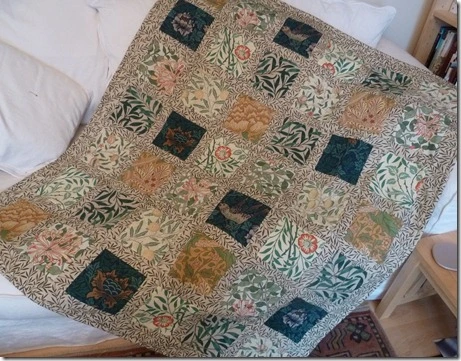
And this is the finished thing. You can see the sashing rippling slightly.

P1040483

I decided to put it over the end of my bed, to try and keep the cat hairs contained.

P1040487

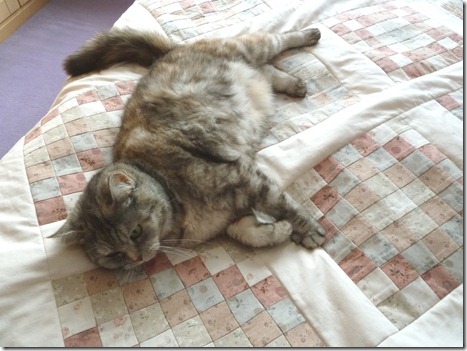
Mollie loves it.

P1040494

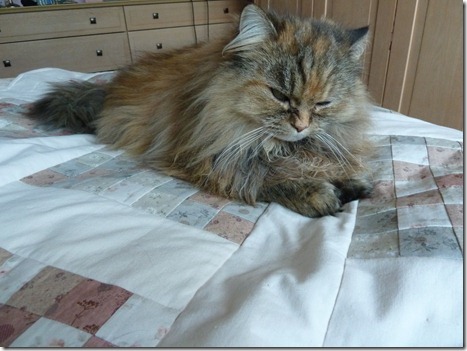
Minnie had a go at lying on it, but really prefers to find the one bit of my bed it isn’t covering, so she can make it nice and hairy. Little minx.

P1040482

I just stitched along the seams of the sashing to quilt it. I machined sewed the binding on, from the front, which was only partially successful – I managed to miss the edge in a few places. I think that technique may need refining!

P1040777

It’s funny, but the patterns in the blocks show up much better on photos than they do in real life.

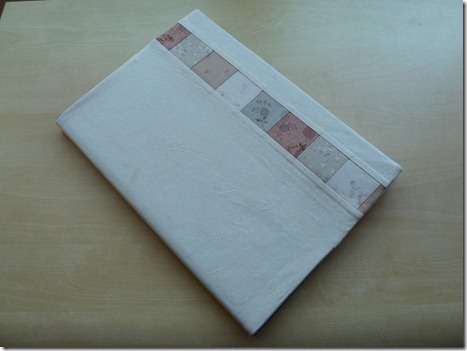
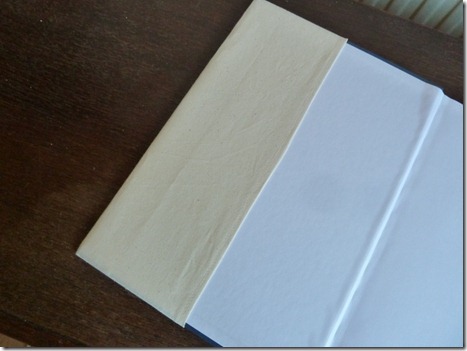
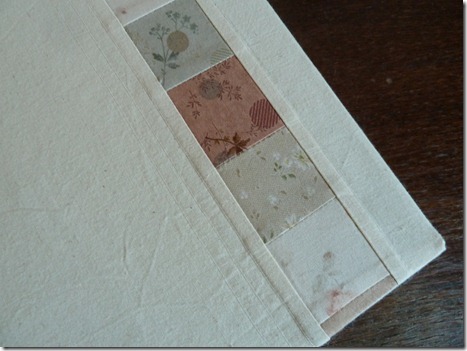
I’d used most of the 2” squares I’d cut, but there were a few left over, as well as a few that weren’t quite 2”, and I remembered another tutorial I’d found on Pinterest, to make a cover for a notebook. I again ironed the squares onto facing, in strips this time, and sewed the seams, then inserted them between pieces of calico, added some stiff facing, and ended up with this.

P1040774

Which makes a very ordinary A4 hardbacked notebook look much nicer.

P1040776

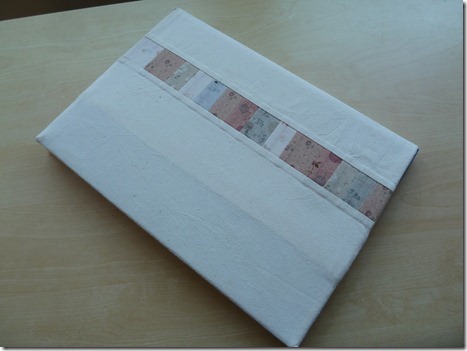
This is the back – you can see the dark blue boards slightly at the edge, which is a shame, but again it’s worse on the photo.

P1040506

It has pockets to hold it on.

P1040504

And there’s top stitching next to the pieced strip.

So there you go – it’s amazing what you can make with five fat quarters, an old duvet cover, facing, and some calico!

Read Full Post »

Little Houses

Once again, I’m all behind with my blog, but I have been busy – my finger seems to be better, after two whole weeks with no knitting at all (that was hard!) so I’ve started knitting again a bit, but I took the opportunity to do some sewing whilst I couldn’t knit, and now I can’t seem to stop making quilts…

P1139196

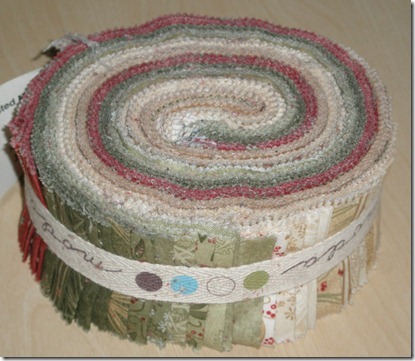
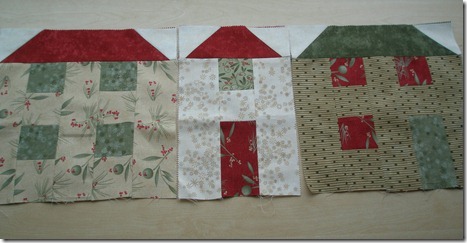
This was the jelly roll which first started me on the slippery slope of quilting – I saw it and a Monkey Buttons pattern, and just couldn’t resist having a go.


photo

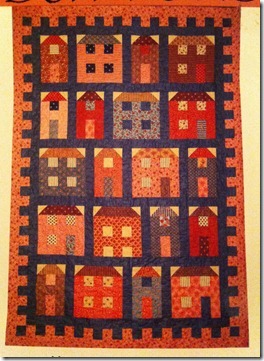
The pattern’s called The House That Jack Built, and consists of three different house blocks. I decided to do all the roofs in red and green, and mix up the colours for the houses. But at that point I hadn’t leant the tricks to make piecing quicker, and it took me ages to do six blocks, at which point I put it all in a bag and left it there.

P3209819

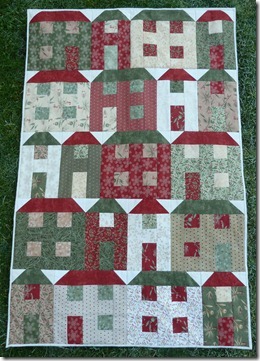
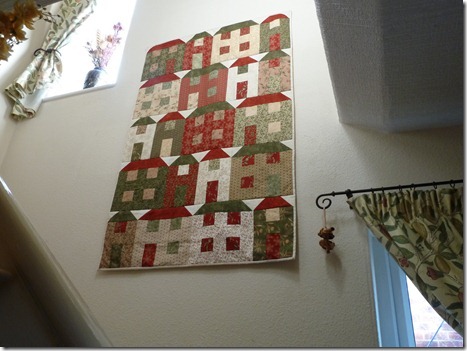
I also wasn’t sure what I was going to do with the quilt once I’d done it, but last weekend I remembered about it and decided to just crack on with it regardless. It only took me a couple of evenings to do the rest of the houses, and I laid them out to make sure I’d got a reasonable mix of colours, before thinking about what to use for the sashing and borders. But the more I looked at the houses laid out on the floor, the more I liked them like that, and the panel was the perfect size for a wall-hanging on my stairs, so I just sewed them together as they were.

P1040764

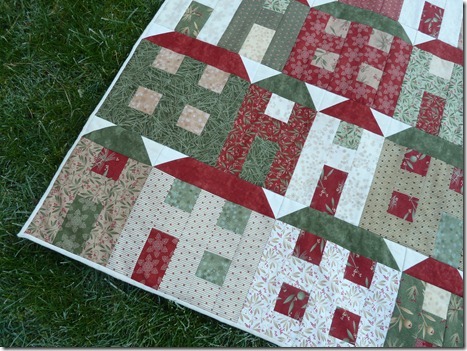
Because it was for the wall, I didn’t do much in the way of quilting, just four horizontal stitch-in-the-ditch lines between the rows of houses. I used calico for the backing and the binding – it’s a very narrow binding, just 1/4”, as otherwise I’d have cut off the corners of the roofs.

P1040765

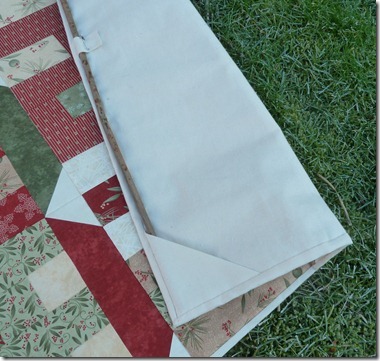
To hang it I stitched half square triangles into the corners when I sewed the binding on, and a loop in the middle – that’s just held down with a safety pin, it seemed easier than sewing it into place. I’ve just used a garden cane and a couple of nails to hang it.

P1040766

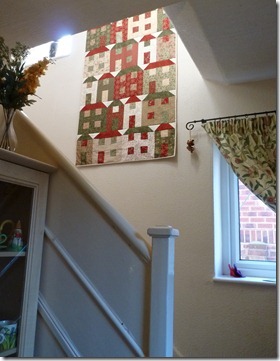
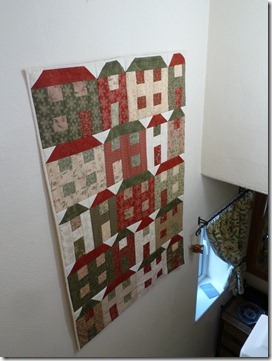
And this is how it looks in place –

P1040771

And the view from the front door – I’m really pleased with the way it fills the space there.

P1040772

The houses remind me of those seaside towns you get on the Yorkshire coast, where all the houses seem to be on top of each other.

P5210004

Like these houses in Whitby.

P1040773

I see the quilt every time I go up or downstairs, and it makes me smile. That’s a result, I think.

Read Full Post »

A couple of days ago, I remembered about Pinterest – I set up an account on there ages ago, and made some boards and did some pinning, then forgot about it, largely because I bought an ipad and couldn’t find an easy way to pin from Safari, and because their app didn’t seem to do what I wanted it to.

But something inspired me to open the app again, and it’s lots better now. I also did some googling, and found how to add a ‘pin it’ button to my ipad bookmark bar, so I can pin things I find as I wander round the internet. I’ve gone a bit bonkers, pinning and repinning lots of things – apologies to anyone who follows me and is overwhelmed, it’ll calm down soon! I’m Minniemoll over there too, if anyone who doesn’t follow me wants to. Oh, and feel free to pin things from my blog if you want to – I know some people don’t like it, but I’m happy to be pinned!

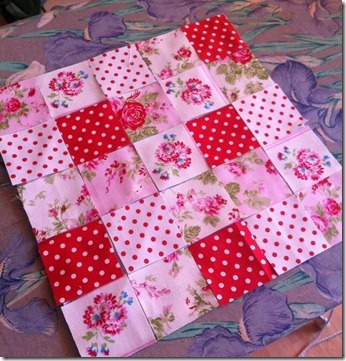
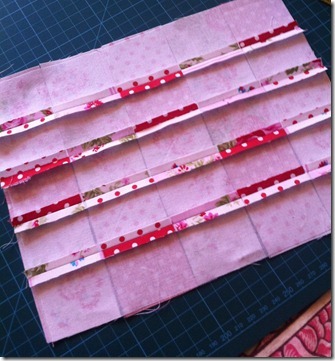
Anyway, one of the things I found and pinned was a link to this tutorial, for an easy way to piece small squares of fabric, and yesterday afternoon I couldn’t resist sitting down and having a go. I found some scraps of the fabric I used to make flowers in the summer, and cut out 25 2” squares, five in each design. Then I cut a 10” square piece of fusible interfacing, and arranged the squares on it.

IMG_2152

I ironed them on, then did the first row of seams, just folding the fabric right sides together at every join.

IMG_2154

I trimmed the very edge of each seam – I started using a rotary cutter to just cut off a bit, which worked well for the edge seams, but not so much in the middle, where there was too much bulk under the ruler to hold it straight, so I used a pair of very pointy scissors instead.

IMG_2155

And ironed the seams flat. I know you usually press them to one side for quilting, but I think that would make too much bulk, with the interfacing as well.

IMG_2156

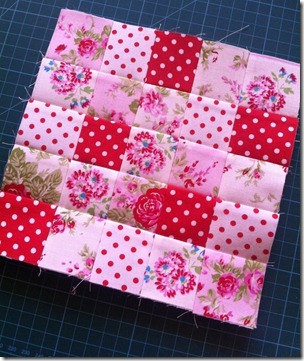
I then repeated the process with the other set of seams, and hey presto! A set of perfectly lined up squares with very little effort – just eight seams and a bit of ironing.

IMG_2157

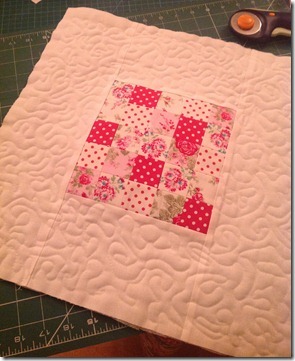
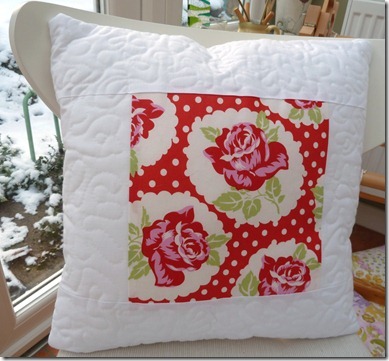
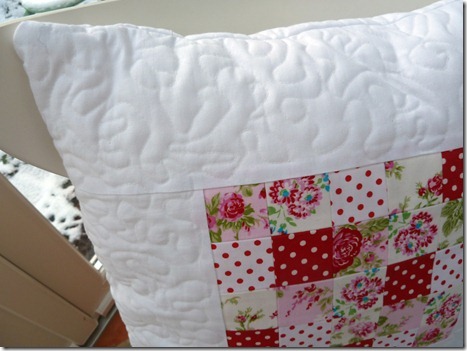
Of course I then had to think of something to do with such a pretty thing, and a bit of digging found some offcuts of plain white fabric, so I gave it a border, attached some wadding, and quilted the border, to make the front of a cushion.

IMG_0469

Apologies for the photos above, by the way – I was snapping them on my phone, and it was a bit dark and murky yesterday.

I thought I had enough plain white to make a back for the cushion, but I didn’t, so I did a similar thing, but with a single piece for the centre. Then I sewed the two halves together, leaving a gap on one side, inserted the inner, and hand sewed it closed – I thought about putting in a zip, but I couldn’t be bothered.

P1040471

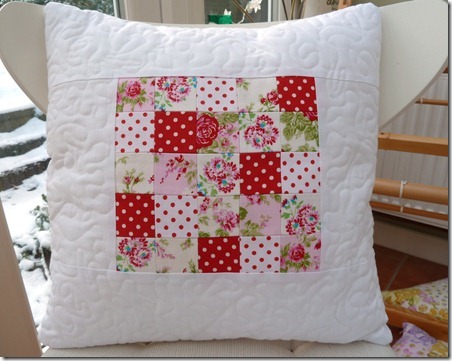
And this is the finished thing.

P1040474

P1040473

You can see the quilting on this one – I used the darning foot for my machine, lowered the feed dogs, and swirled away. It’s not perfect, but it’s not bad, and it frames the lovely panel nicely. The centre panel is 7.5” square, and the cushion is about 15” square.

Read Full Post »

New cushions

I’m still sewing, largely because I’ve done something to the bottom joint of the first finger on the left hand, which is making it hard to knit (I can use the second finger, but it’s not as easy, so I’m not knitting nearly as much as usual). I’m hoping it’s not RSI, and that I’ve just injured it somehow, but I’m starting to think that it might be :(

But at least with all my new fabric I have plenty to sew! I may have just slipped back into the shop and bought a bit more on Wednesday. Just possibly. Oops.

2013-01-16 18.02.54

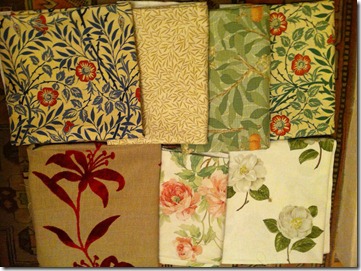
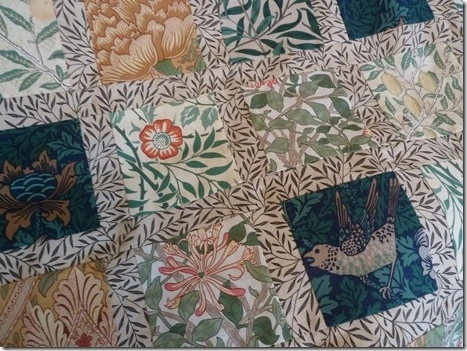
There’s four more pieces of William Morris, a piece with gorgeous velvet flowers, and a couple of floral pieces. All for £38. There’s over a metre of each, and some have more than that.

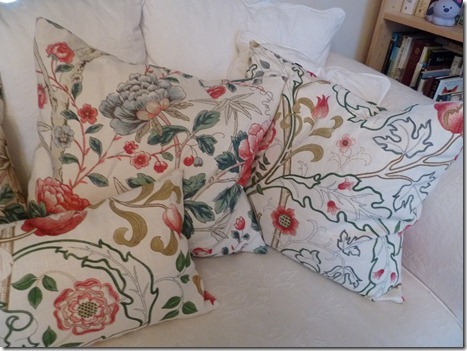
But yesterday’s project involved some of the stuff I bought the week before, two similar Morris floral prints, on a linen-y type base fabric.

P4023211

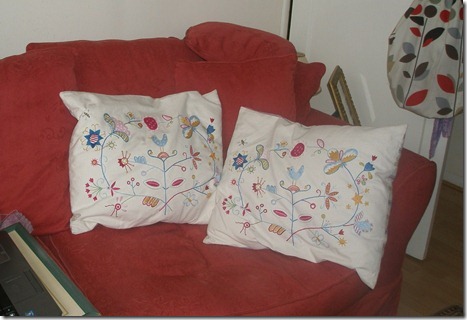
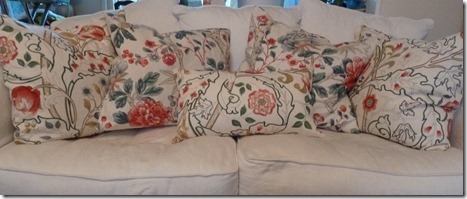
I’ve had four of these Ikea cushions on my living room sofas for years now, and whilst I still like them, the embroidery was getting a bit tired and snagged, and I thought that a change would be good.

P1040468

So now they look like this. I also covered a little cushion that was hanging about, with a hole in its cover.

P1040470

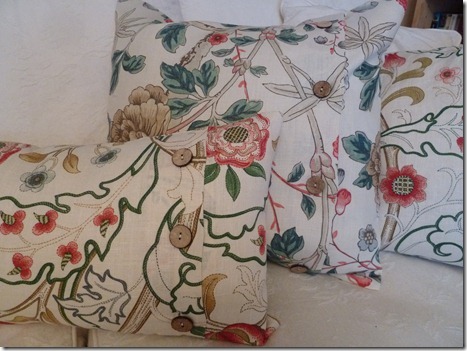
They’re very simple covers, just a long strip of fabric round the length of the cushion. I used wonderweb to hem the folded edges, for ease and so that there were no visible stitching lines, then put buttonholes in one end, sewed them into and envelope, and sewed the buttons on. Nineteen buttonholes and nineteen buttons – it did get a little tedious, but it was worth it!

P1040469

They’ve brightened the living room up nicely :) Now what can I find to sew today?

Read Full Post »

P1040465

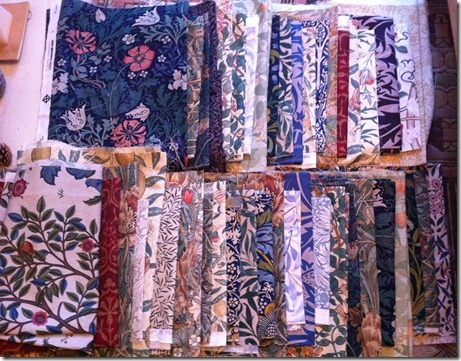
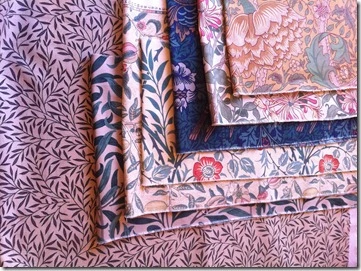
Last Wednesday I was on a lunchtime wander round York, when I passed a curtain shop with a small sign saying they had roll ends from £3 per metre, and bags of scraps from £5. I couldn’t resist a look, and was amazed to find that the bags of scraps were enormous bags of big pieces of lovely fabrics, much bigger than I was expecting. I did go a little bit crazy, ending up with two big bags of ‘scraps’, for £10 each, and £50 worth of roll ends. I had to leave them there as I couldn’t manage it all on my bike, and hold my impatience until I could go in in the car on Saturday. But it was worth the wait! I was like a child at Christmas as I unpacked it all :)

IMG_2129

This is the two bags of scraps – all William Morris Sanderson prints, mostly full widths of fabric, and varying between about 20cm and half a metre. There are multiple pieces of some of the fabrics too. I’m very pleased with this lot!

IMG_2132

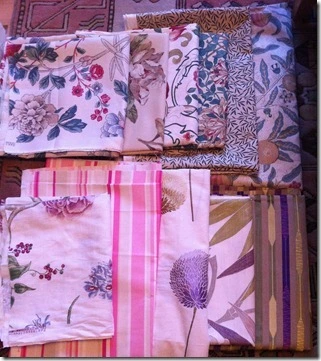
And this is the bigger pieces, more Morris, and a few pieces of more contemporary designs.

IMG_2134

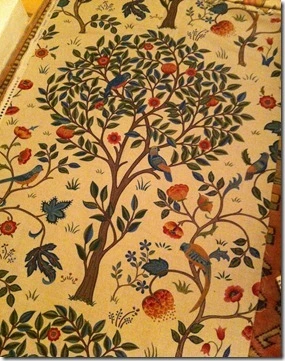
This is my very favourite piece, it’s a half width, but it has the full repeat of this beautiful tree on it, which is about 60x80cm. My first thought was to frame it, and I’m still thinking along those lines, but now I’m thinking it’d be nice to embellish it first by sewing over some areas with embroidery thread. So that might be a project for the future.

IMG_2142

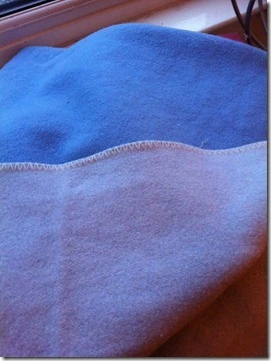
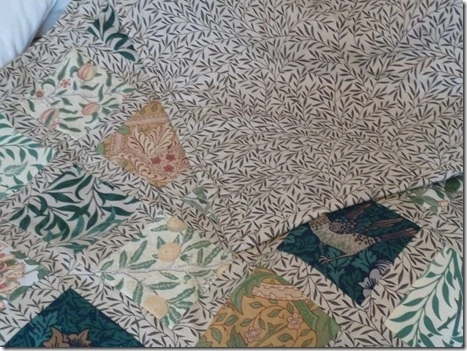
But my first project was to make a quilt, to keep on the sofa for chilly evenings. I’d come across this old wool blanket a few weeks ago, and was thinking of upcycling it, so this seemed like the perfect chance, especially with the heavier upholstery fabrics. I reluctantly discarded some of the coarser weave ones, thinking they’d probably fray too much, and decided on six floral prints, with a leafy one for the background and backing – that was one of the ones I’d bought a roll end of, and there was more of it in one of the bags.

IMG_2136

I did some sums, and decided that for the size of my blanket, I needed 6” squares with 1.5” sashing in between.

IMG_2137

So I spent an evening cutting out squares, doing a bit of fussy cutting to centre the bigger designs.

IMG_2139

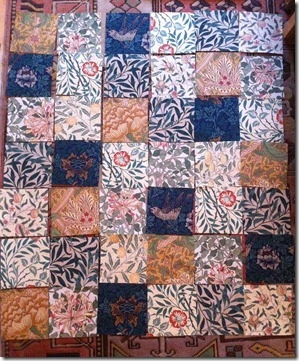
Then worked out a layout that looked random but does in fact have a pattern to it – the first six rows have one of each fabric in every row and column (think sudoku!) and the last row is a repeat of the first one.

IMG_2140

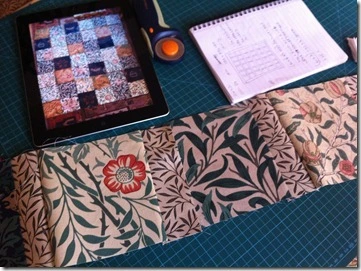
I took these photos on my ipad, and it was very handy when it came to checking the layout as I sewed the pieces together – new technology helping an old craft!

IMG_2141

I sewed all the smaller sashing pieces in first, then inserted the long horizontal strips, before adding borders.

IMG_2143

I didn’t want to quilt this, due to the thickness of the blanket in the middle, so I’ve tied it, one tie in the centre of each cross of the sashing. I hope it holds!

P1040466

I did sew the binding on by machine, using my walking foot, but as I suspected my machine really didn’t like it – it kept skipping stitches, leaving very long stitches, and generally misbehaving. But I got there eventually, and then spent an evening handsewing the binding down on the back.

P1040463

And this is the finished thing! It’s lovely and warm, and a good size for the sofa (about 45” x 51” – the blanket was a single bed size, but I think it had shrunk when I washed it years ago).

P1040467

Read Full Post »

Happy Christmas!

2012-12-04 11.35.25

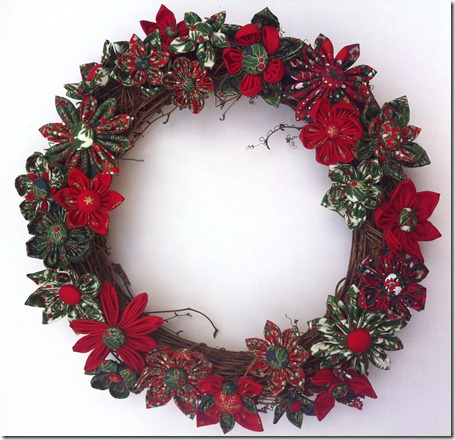
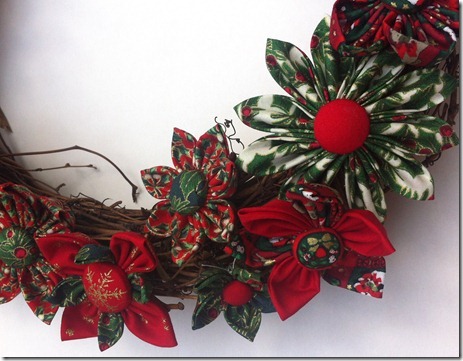
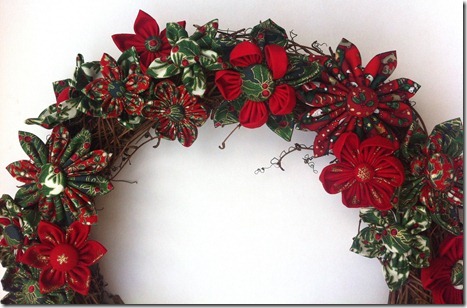
I’ve been a rubbish blogger lately, I know. My new year resolution is to do better. But I have been making things, and to prove it, here’s the Christmas wreath I started a while ago.

2012-12-04 11.36.02

I’m incredibly pleased with it! And with the rattan circle I picked up from Hobbycraft (we now have one in York!) instead of the polystyrene circle I was thinking of.

2012-12-04 11.35.54

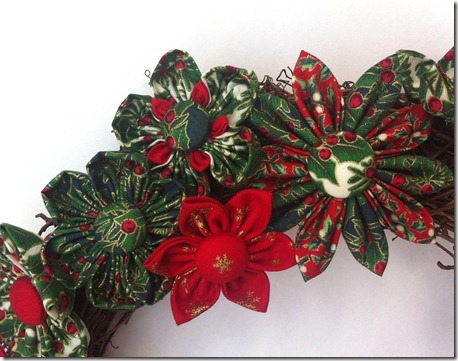
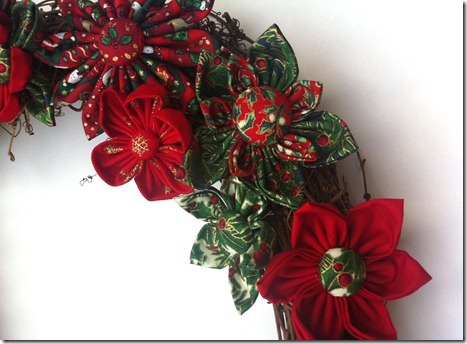
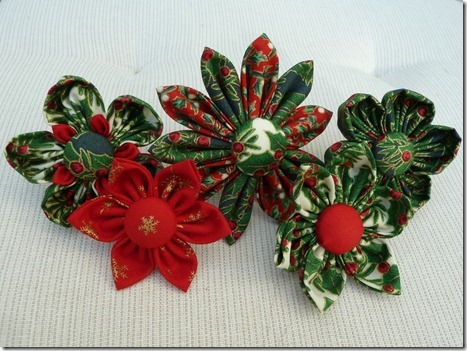
Before I glued the centre buttons in place, I threaded a length of florists’ wire through the shank, then bent it in half, and just pushed it into the wreath. The flowers are a bit liable to fall off if roughly handled, but it’s safely on the wall (I’m not risking it on the front door!) so they’re not going anywhere. I just need to find a suitable sized box to store it in.

2012-12-04 11.35.47

There are 25 flowers in total, with between five and ten petals each, so including the centres that’s over 200 circles of fabric I cut out. All by hand. I think I’m circled out for the time being! But I can see that a less Christmassy one would be pretty too, perhaps on a heart shaped base if I can find one.

2012-12-04 11.35.32

And that’s it from me for tonight. Have a lovely Christmas, may your stockings be full of wonderful crafty things (and if they aren’t, well, that’s the perfect excuse to treat yourself…!)

Read Full Post »

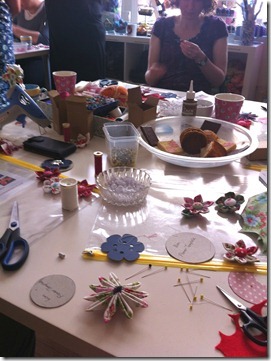
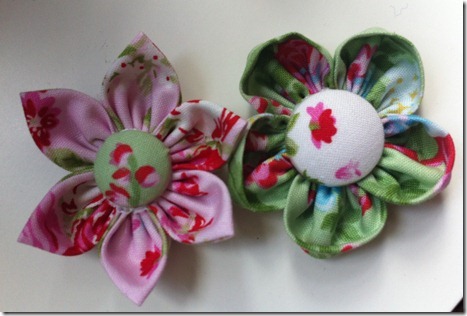
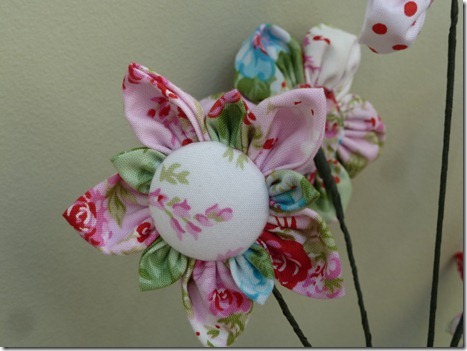
Back in the summer (I use the term loosely), I attended a class at the lovely Grace and Jacob, taught by the very talented Bryony to learn how to make fabric flowers, having seen a sample in the shop and been fascinated by them.

IMG_1628

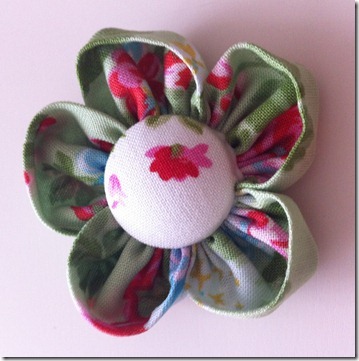
It wasn’t nearly as hard as I’d thought it might be, and within an hour we’d all made our first flower.

IMG_1623

Which was soon joined by a second, with pointy petals this time.

IMG_1624

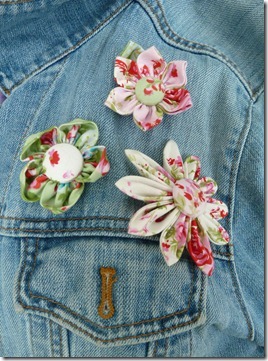
And then a third, with pointy folded petals. We sewed pins on the backs, and they’ve been happily adorning my denim jacket ever since – and are only a little the worse for wear!

P1040078

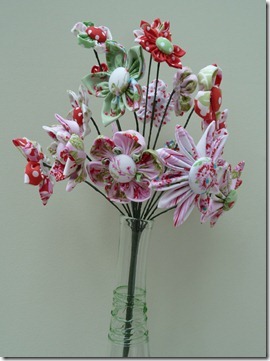
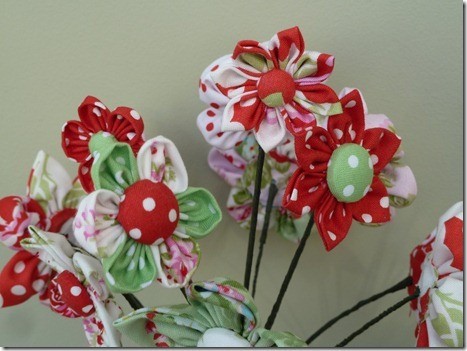
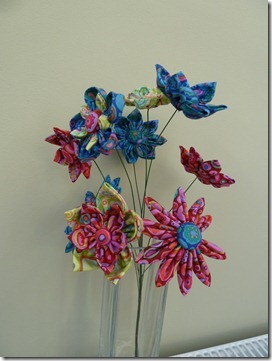
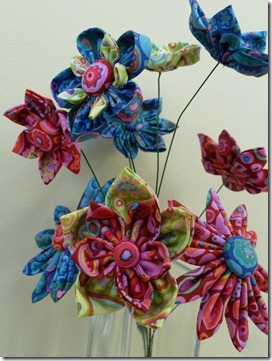
But what I really wanted to do was to make a bunch of flowers to put in a vase. I’d chosen these fabrics because they’re from the same range I used to make baby quilts last year, and I had leftovers. Which I attacked as soon as I got home, and before I knew it I had lots of flowers – it’s strangely addictive, especially when you realise that you can combine different shapes and sizes of petals, and mix fabrics, the possibilities are endless.

P1040082

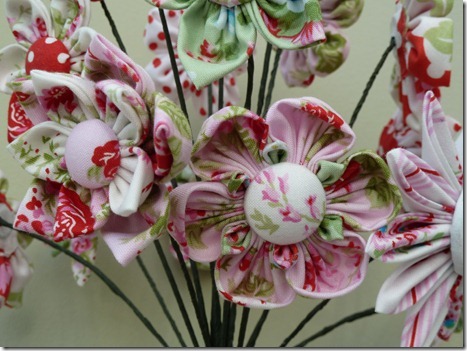
A few close ups of different combinations and sizes of petals –

P1040073

P1040075

P1040072

I covered the stems of these with florists tape, but it was horrible sticky stuff (or at least the roll I got was!) and since then I’ve only used it for holding bunches together.

IMG_1654

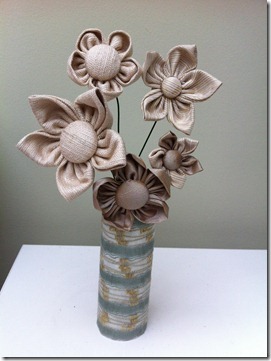
Like this one. A tiny bunch (the whole thing including the vase is only about seven inches tall) using silk leftovers from the cushion I made last year. These flowers are great for fabric scraps, I’ll never throw any away again! And as the scraps get smaller, so do the flowers…

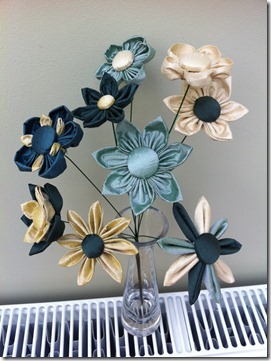
One thing I did find with the silk though was that it frayed like mad, so when I decided to make a bigger bunch for my mum’s birthday, I used bondaweb on the back of the silk before cutting it to hold it together, which worked much better, and stiffened the silk slightly too.

IMG_1711

I also had leftovers of some Kaffe Fassett paperweight fabric in red, so I bought a couple more fat quarters in lime green and blue to go with it, and made this bunch. It was going to be for my desk at work, but we’ve recently adopted a clear desk policy (which is a complete nightmare to untidy me) in preparation to our move to a new headquarters building where we’ll all be hotdesking. I am so not looking forward to that! But anyway, back to the flowers.

P1040067

P1040068

My next project is to make a Christmas wreath, using a polystyrene circle. I’ve made five flowers for it so far, I should be able to make enough in the next two months to finish it!

P1040077

They’ve all got a u-shaped piece of wire on the back, going through the shank of the central button, so they’ll just push into the polystyrene. Well, that’s the theory, anyway!

Read Full Post »

Oh dear, this has been a very neglected blog of late. I’ve not been feeling brilliant, and I find that whenever I feel a bit down, my words are the first thing to go – I try and write, but it all just comes out very stilted and I give up. I’m still not quite right, but I’m feeling a bit better, and I managed to take some photos today which don’t make me look dreadful (as most of the last lot did), so I’ll start trying to catch up on what I’ve been knitting.

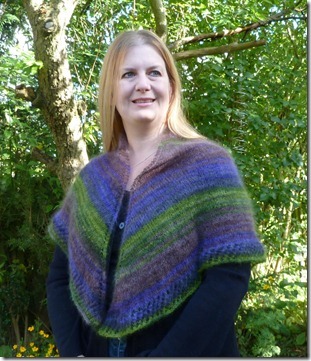
Starting with the most recent and working back (because that’s the most logical way to work, obviously), here’s a little shawl in the beautiful Kidsilk Stripe from Rowan.
P1040046

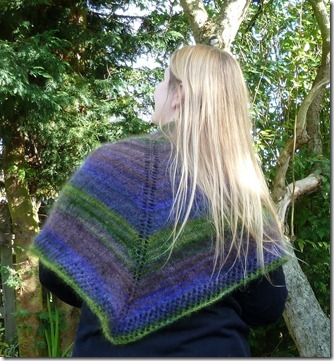
I’ve been lusting after this colourway (twilight) for ages, and I finally cracked and treated myself to a ball a couple of months ago. This very simple pattern – mostly stocking stitch with an easy lace edging – seemed perfect for showing off the amazing colours in the yarn (the colours haven’t come out brilliantly in the photos, the stripe above the lime green is actually a beautiful purple, and the stipe which looks purple is more muted. But you get the idea).
P1040045

The Kidsilk Stripe seems expensive at £18 per ball, but it’s a 50g ball (compared to 25g for regular Kidsilk Haze), and this shawl only took one ball. So pricy but not extortionate. Unfortunately I have a yearning to make a cardigan or jumper out of this colourway, which is going to take at least three balls. Hmm, better start saving up!
P1040027

Next up is a huuuuugggge shawl, in a merino/possum mix yarn, and Noro Silk Garden. I bought the possum a few years ago, from the Knittery in Australia when they were closing down, and I’ve been waiting for the perfect project for it ever since. Similarly three balls of Silk Garden in a long discontinued colourway have been sitting in my stash, and this was the perfect opportunity to put them together.
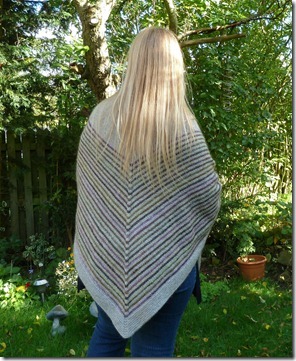
P1040039

The pattern is Sonia’s Shawl, and it calls for equal amounts of yarn. I had 640m (in four skeins) of one, and 300m of the other, so I used the first skein of the possum at the top of the shawl, then striped the silk garden with the next two skeins, and used the last skein and a bit to do a garter stitch border.
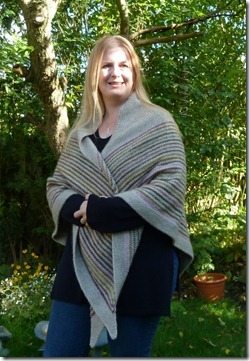
P1040042

To say I’m happy with this would be something of an understatement – it’s one of my favourite things of everything I’ve knitted. It’s going to live on my sofa in the winter, and keep either my shoulders or my legs warm, and if it gets really cold it’ll go over my coat as a lovely snuggly furry layer :)
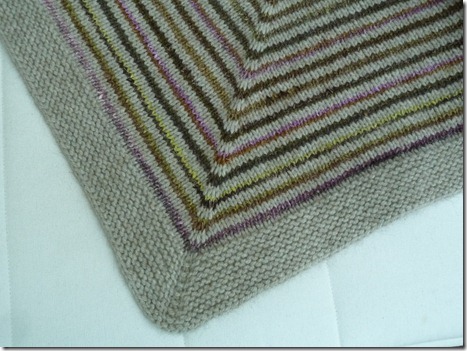
P1040065

And it’s why I love Noro so much – you can do an incredibly simple pattern and the wonderful colours make it look absolutely stunning.

(Pause for a slight interruption – this is another reason it’s sometimes hard to blog –

IMG_1918

Someone thinks that the space between the laptop and my face is her space. Thankfully she never stays very long!)

And back to the knitting. Continuing the shawl theme, when I saw the Leftie pattern I couldn’t resist starting one pretty much straight away.
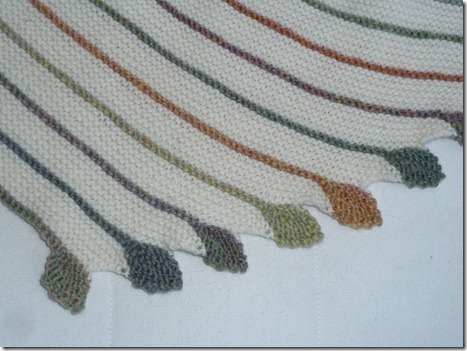
P1040055

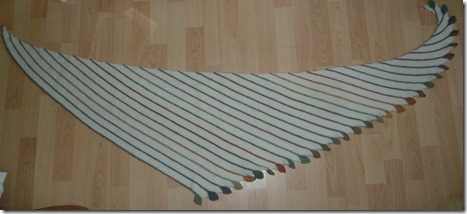
The pattern’s written to use up leftovers, using a different yarn for each leaf (hence the name Leftie), but the thought of all those ends to sew in had me running away screaming, so I had to come up with a plan b. Which was to use handspun yarn, and it worked perfectly! This was a skein I’d spun a couple of years ago, and then gone off as all the colours seemed to merge together in the skein. Thankfully when I started knitting they sorted themselves out again – and because the leaves are done with short rows all at once, you’re only using a short length of the yarn and the colours came out fairly clear. If that makes sense!
P1040054

This is the whole thing once it was done – you start at the small end and the rows get longer, then you stop once you lose the will to live. Which was after 30 leaves in my case. The pattern’s written for fingering weight, but I used DK, largely because I bought a huge amount of cheap wool/alpaca mix from Kemps a while ago, and wanted to use it up. Well, make a start, anyway.
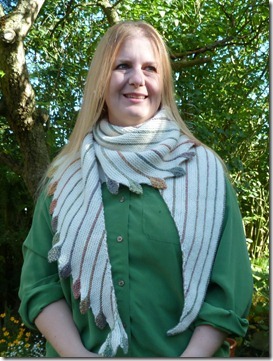
P1040017

And this is the shawl in action – it’s very cosy!

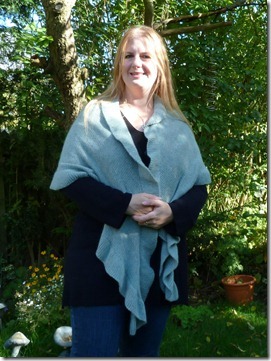
Last up on today’s photo session was a shawl I finished a while ago, but failed to photograph in any sort of flattering fashion. I had better luck today, thankfully!
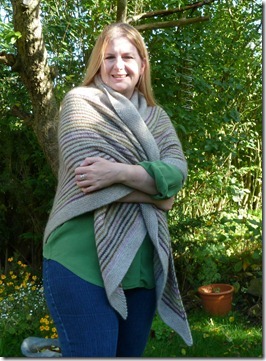
P1040030

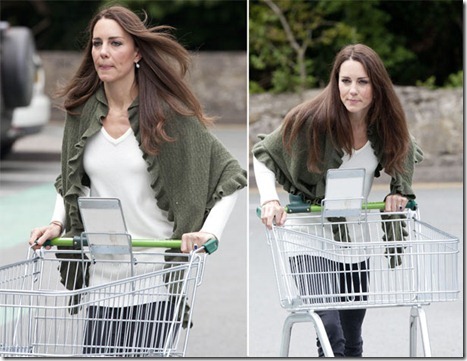
The knitting world went mad last year when Kate Middleton was photographed just after her wedding wearing a shawl with a frilled edge.
Kate shawl

There are now lots of patterns for similar shawls on Ravelry, but none of them seemed quite what I wanted until I saw Atlantic Storm. It’s a very plain shawl – Kate’s was patterned in the body, but I thought that would be too much with this DK weight yarn, so I wanted to stick to stocking stitch.
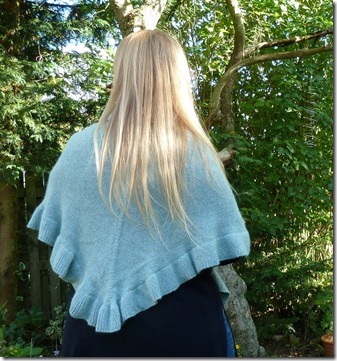
P1040033

It’s a shallow triangle, increasing at the ends of three rows out of every four, then stitches are picked up along the top and then a couple of rows of increases worked until there were – wait for it – over 1800 stitches for the edging. Which is all in 1×1 rib. Thankfully I was watching tennis at the time, so I needed mindless knitting. I just slogged away at it until I’d done 19 rows, then thought about casting off. I knew I didn’t want to do a standard cast off, which always looks odd on rib to me, and the only other one I could find in most places was a sewn tubular one. Which is fine for the edges of garments where you have under 100 stitches, but the thought of doing 1800 stitches filled me with dread, not to mention how many ends I’d have to sew in.

So I did some more searching on Ravelry forums, and came up with a link to Techknitter’s fake tubular bind off. Which is a bit more fiddly than a regular one, but gives a lovely edge.
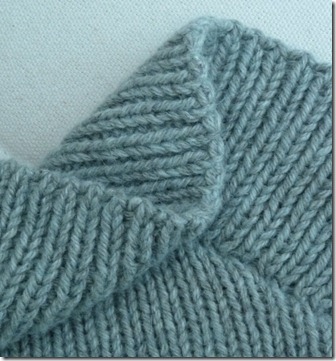
P1040059

It’s not a stretchy cast off, so I’m not sure how useful it’d be for garments, but it was perfect for this. The section in the middle of the photo above is actually the right side, but I decided that I liked the reverse better, so I cast off the other way round the circle. And about five hours (!) later I was finally done.
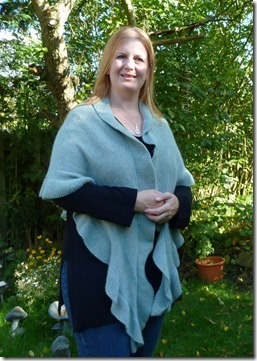
P1040036

The yarn’s Rowan Cashcotton DK, which is lovely and soft. The 18% angora content does mean that it will spend the next five years shedding over everything it comes in contact with, but hey, soft!
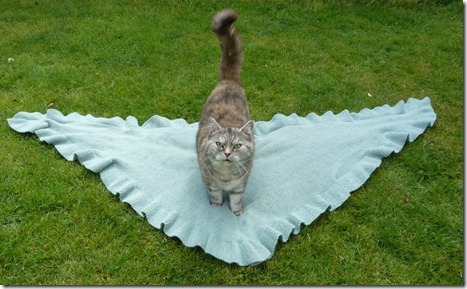
P1030681

Why do cats always stand on knitting the minute you put it on the floor?

And I think that’s enough for tonight! There is more to come, but I think that’s plenty for one post. I’ll try not to leave the next one so long, honest…

Read Full Post »
Kusha-esque

I’m always fascinated by the Habu Textiles stand when I see it at knitting shows, and their yarn with a very thin stainless steel core had intrigued me for ages before I bought a cone of it at the Ally Pally show, back in 2010. There was a pattern with it, for a scarf, but I only did a few rows before I decided that it was just too thin to enjoy working with it on its own, plus I didn’t like the fabric it was producing.

057 (2)

I looked on Ravelry, and found that there was another pattern for a similar scarf, but worked with another strand, of merino. So I pulled it out, and at the Harrogate show later that year, I bought the required merino, and another cone of the wool and stainless steel. Then put it all in a cupboard and forgot all about it. Which isn’t like me at all, obviously.

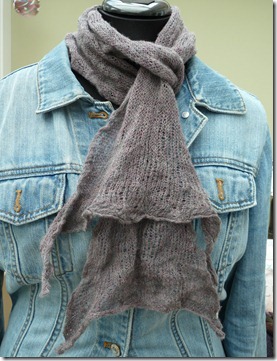
P1030144

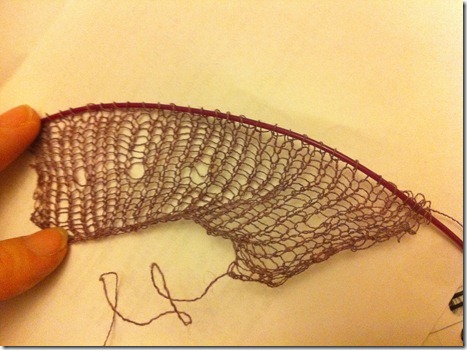
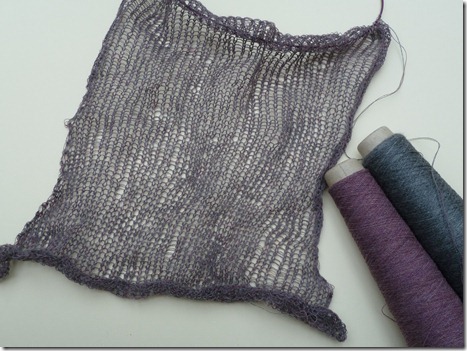
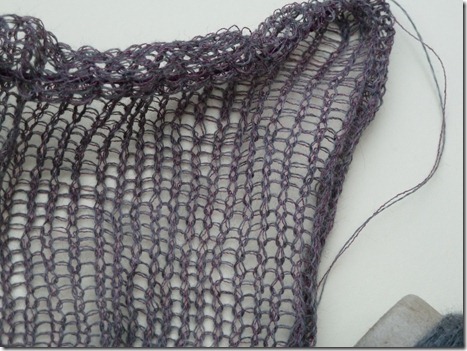
But then a couple of months ago there was a thread on one of the Ravelry forums about the stainless steel yarn, and it prompted me to pull it out and have another go with it. The pattern most people use is Kusha Kusha, which starts with a decrease section with both yarns held together, then carries on with both yarns for a while before switching to just the stainless steel one and decreasing needle size. All of which sounded a bit unnecessary to me, so I used both yarns all the way, and increased at the end to match the beginning.

P1030145

The fabric was still a bit coarse (someone at Knit Night said it looked like chain mail, which almost put me off the whole thing!) but the pattern said to felt it slightly when you were done. I really should have done a swatch and felted that, if only to reassure myself, but whilst I’m a firm believer in swatches for garments, I pretty much always just wing it with everything else, so I didn’t.

P1030478

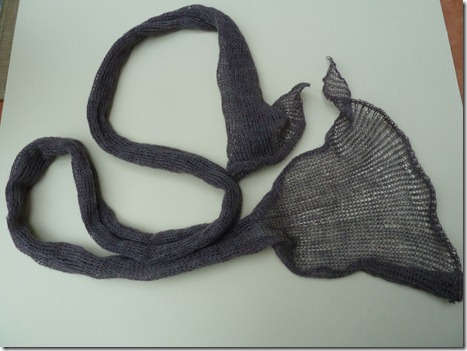
When I started this I envisaged it as a reasonably long term simple project, that I could take along to Knit Night or do in front of the tv, but once I’d started I somehow couldn’t stop, and it was finished in no time. Not knowing how much it would shrink when felted, I guessed at a bit taller than me (very scientific!) and this is what it looked like when I cast off.

P1030483

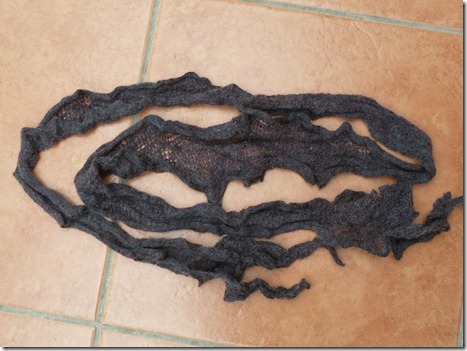
And this is it after felting! I did it by hand, with a bowl of water as hot as I could get it from the tap, and a bowl of cold. I’d dip it in the hot (with rubber gloves), then into the cold where I’d rub it about a bit, then repeated that a few times till the edges started to felt. To dry it I laid it out flat, then pulled the edges into soft points all the way along.

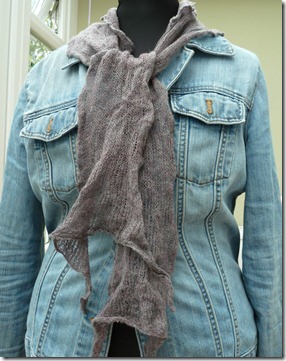
P1030518

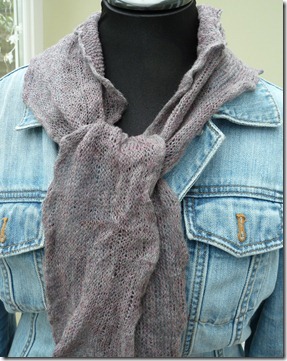
And this is the finished product! It’s rather different from anything else I’ve made, but I do like it. The stainless steel in the yarn is fun, in that you can shape it a bit – if you crease it it stays creased, and it has a bit of body to it.

P1030524

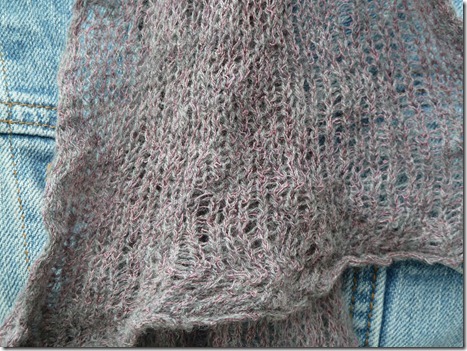
The felting process has softened up the fabric considerably too – it looks much less like chain mail now!

P1030482

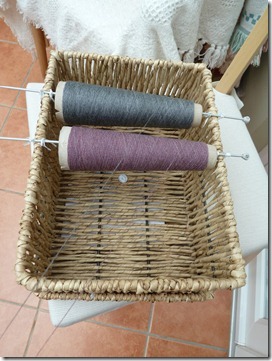
One problem I did have was with knitting from cones – I mostly knit on the sofa, with my ball of yarn to my right, between me and the back of the sofa (and my legs up on the sofa in front of me), but that didn’t work with cones, they just kept rolling around and I was afraid of snapping the yarn if I pulled. So I used an old pair of straight needles and a basket to rig up a sort of lazy kate for cones (they were about half an inch too big for the kate I use for plying when spinning!)

P1030519

P1030522

Read Full Post »
I’ve been in a bit of a lull, craft-wise, for the last few weeks – I became strangely addicted to making crochet throws and couldn’t summon up the energy to do anything more challenging than go round and round the outside of a square.

P1030141

But my second one is now finished, and I’m not starting any more for a while!

P1030136

This one’s in RYC Luxury Cotton dk (long discontinued, unfortunately). I had two balls of blue left over from a cardigan, and the other ten balls came from Kemps in their great Rowan bargain bags a couple of years ago. Whoever put them together chose the colours well, and they’ve made a lovely throw. There were five balls of the pink, and two of each of the others apart from the dark blue, and I thought I’d worked out a stripe sequence to use them evenly, but I failed miserably and had two and a half balls of pink left at the end. So I used them to do a border – four rows of triples with one chain between, then a row of doubles round the edge to finish it off. I’m pleased with it, and it’s used some yarn up. It’s a bit of a drop in the ocean, but I suppose it’s a start!

My next project is a very old WIP – I started this Coraline cardigan nearly two years ago, I know I knitted the body up to the armholes during Wimbledon that year. Then it was abandoned until last April, when I did the sleeves, and the yoke up to the start of the smocking, when it languished again. This time I’m going to finish it!

P1030142

But the smocking was nearly the project’s downfall – the pattern says to slip the first knit stitch onto a cable needle and hold at the front, slip the next four purl stitches onto the right needle, slip the next knit stitch onto the cable needle, slip the purl stitches back to the left needle, wrap the two knit stitches on the cable needle with the working yarn, knit the first one, purl the four purl stitches, then knit the other knit stitch from the cable needle. Which makes sense if it is rather long winded, but I hate cable needles at the best of times, and having one dangling at the front of my work with one stitch on it was just horrible. I did about six wraps, then turned to Ravelry for an alternative. Thankfully it didn’t let me down, and I found Interknitty’s very helpful notes, which basically say to wrap the first knit stitch before working it, purl the next four, pick up the wrap, knit the next stitch, then slip the wrap over it. Which is tricky in the multi-stranded Bamboo Soft yarn I’m using, but much easier than messing about with a cable needle!

P1030143

The wraps round the smocked stitches are stretching out a bit more than some others I’ve seen, but I think it’s because the bamboo yarn is very slippy and isn’t gripping the stitches. It’ll do! I just want it finished now, and I’m not too far off. I’m doing another repeat (six rows) of the smocking pattern as my row gauge is off, but I’m nearly there, thank goodness.

P1030144

And now for something completely different! I bought two cones of Habu merino/stainless steel yarn (in lilac) and one of the merino (in grey) at the Knitting and Stitching Show a year or two ago, and seeing a reference to stainless steel yarns on Ravelry prompted me to get it out and have a go at using it. I’m sort of following the Kusha Kusha scarf pattern, but I’m not going to change to a single yarn for the second half, I’ll just keep going in the two held together and see how long it turns out.

P1030145

It’s looking quite wiry and open at the moment, but you hand felt the finished scarf, and apparently it makes it more fabric-like. I really should have done a swatch first to see how it works, but I’m living dangerously on this one!

So those are the projects I’m taking to Anglesey with me this week, with maybe a sock as well (there’s a couple of half-finished ones lurking in my WIP box). I’ll let you know how I got on when I get home!

Read Full Post »
Older Posts »