Feeds:
Posts
Comments

Posts Tagged ‘quilting’

Little squares quilt

You may (or may not!) remember a post I made a few weeks ago, about a cushion I’d made using a new-to-me method of piecing small squares accurately, using iron-on facing – the tutorial I used can be found here. The tutorial talks of facing with a 2” grid marked on it, and I eventually managed to track some down in the UK, which wasn’t easy, as not many places stock it, and then had a play with it.

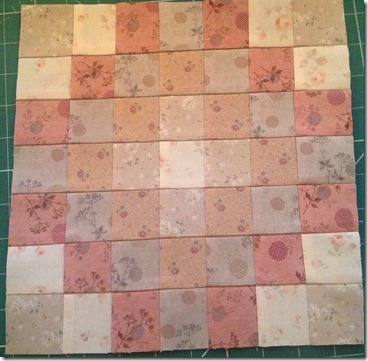
I found five fat quarters from the same range in my stash, and cut them into lots of 2” squares, then started making layouts of 7 x 7 squares (that being the width of my ironing board, so easy to do…!)

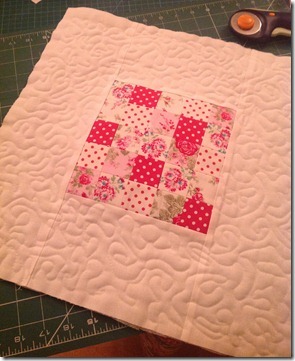
photo-1

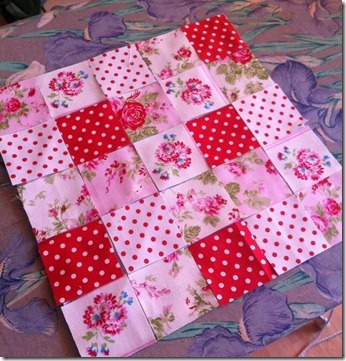
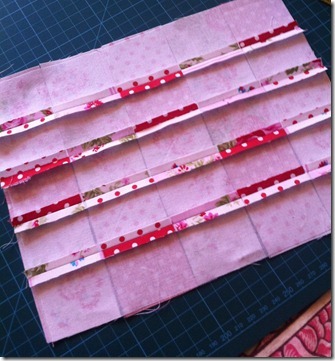
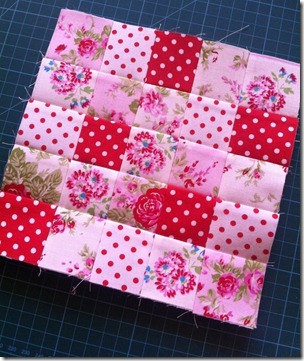
I completely failed at taking any sort of progress shots, this is the only one I managed, of the first square. This time I didn’t trim the seams and iron them flat, I simply pressed them to one side, then sewed the seams in the other direction, so there’s only twelve seams per block. You can see the lines of the seams a bit, but that would be eased by making the squares ever so slightly less than 2”, as in places they overlap, which adds bulk to the fold of the seam. I’ll try and remember for next time!

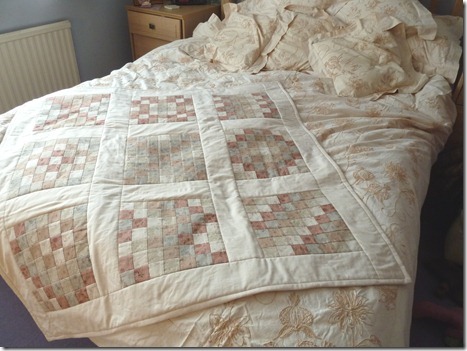
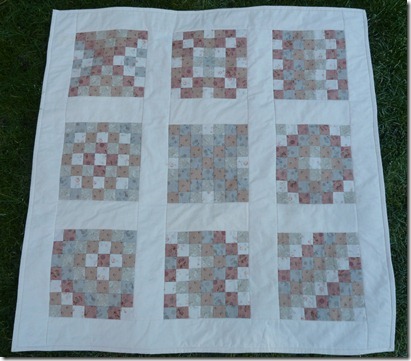
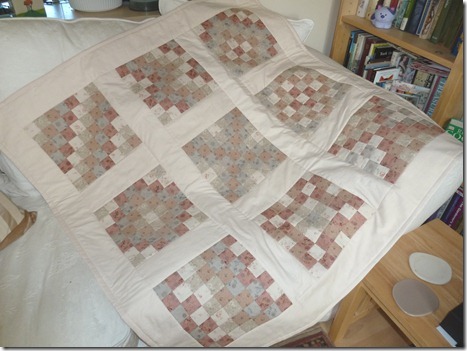
So I made nine blocks, then found an old duvet cover and cut strips of it to make sashing and binding, before backing it with calico for cheapness sake – this was really only me seeing how the blocks behaved in a quilt. With hindsight I’d have been better off using quilting fabric for the sashing, the duvet cover is pure cotton, but it had been washed quite a few times, so it’s lovely and soft, and contrasts rather too much with the stiffer blocks. But it’s not bad, I’d use this method again for quickness and accuracy.

P1040478

And this is the finished thing. You can see the sashing rippling slightly.

P1040483

I decided to put it over the end of my bed, to try and keep the cat hairs contained.

P1040487

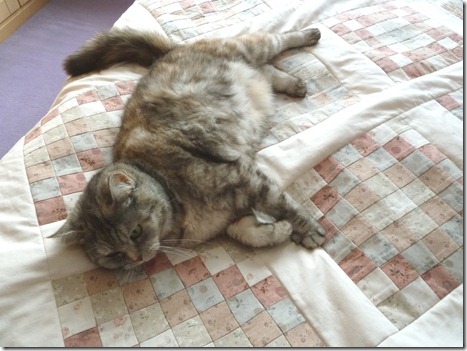
Mollie loves it.

P1040494

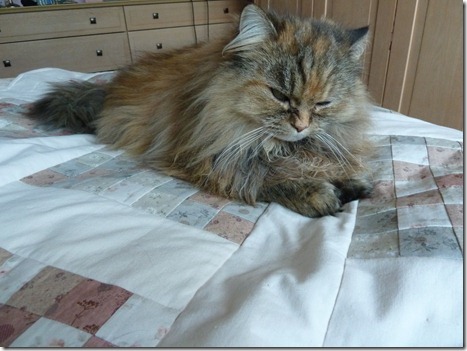
Minnie had a go at lying on it, but really prefers to find the one bit of my bed it isn’t covering, so she can make it nice and hairy. Little minx.

P1040482

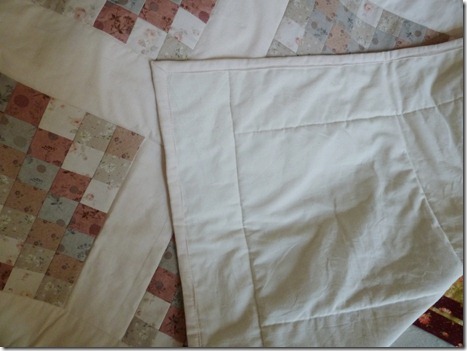
I just stitched along the seams of the sashing to quilt it. I machined sewed the binding on, from the front, which was only partially successful – I managed to miss the edge in a few places. I think that technique may need refining!

P1040777

It’s funny, but the patterns in the blocks show up much better on photos than they do in real life.

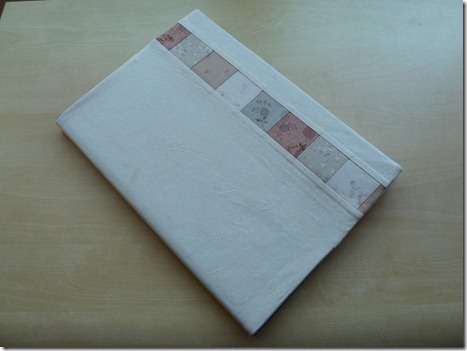
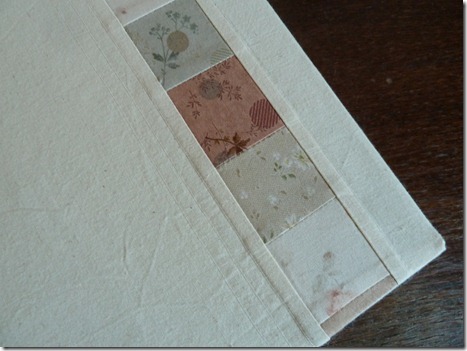
I’d used most of the 2” squares I’d cut, but there were a few left over, as well as a few that weren’t quite 2”, and I remembered another tutorial I’d found on Pinterest, to make a cover for a notebook. I again ironed the squares onto facing, in strips this time, and sewed the seams, then inserted them between pieces of calico, added some stiff facing, and ended up with this.

P1040774

Which makes a very ordinary A4 hardbacked notebook look much nicer.

P1040776

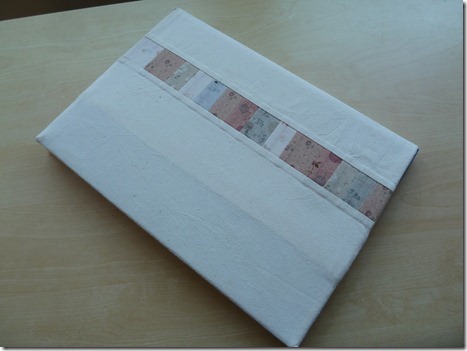
This is the back – you can see the dark blue boards slightly at the edge, which is a shame, but again it’s worse on the photo.

P1040506

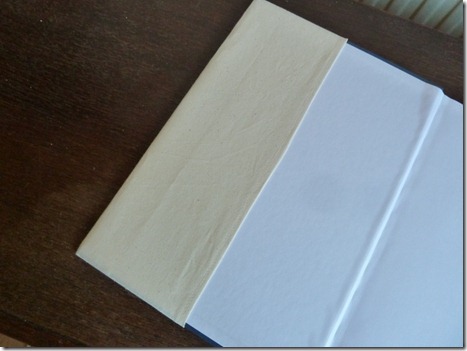
It has pockets to hold it on.

P1040504

And there’s top stitching next to the pieced strip.

So there you go – it’s amazing what you can make with five fat quarters, an old duvet cover, facing, and some calico!
Read Full Post »

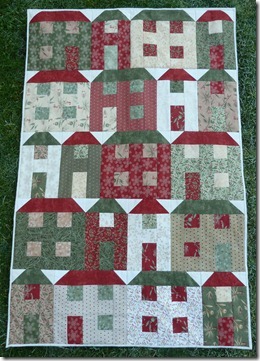
Little Houses

Once again, I’m all behind with my blog, but I have been busy – my finger seems to be better, after two whole weeks with no knitting at all (that was hard!) so I’ve started knitting again a bit, but I took the opportunity to do some sewing whilst I couldn’t knit, and now I can’t seem to stop making quilts…

P1139196

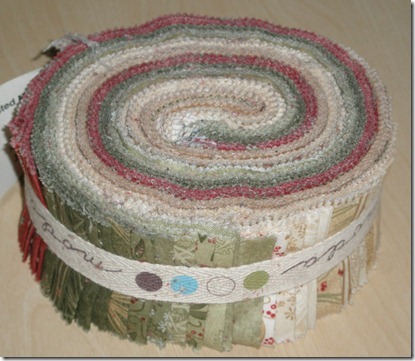
This was the jelly roll which first started me on the slippery slope of quilting – I saw it and a Monkey Buttons pattern, and just couldn’t resist having a go.


photo

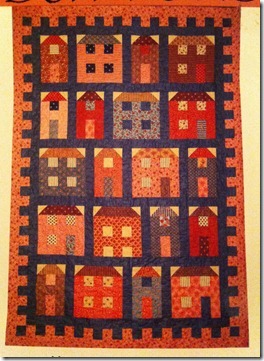
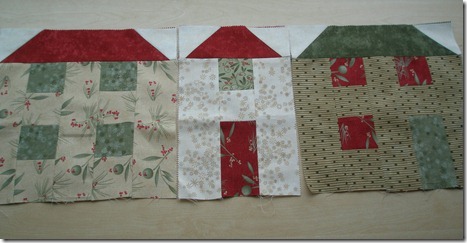
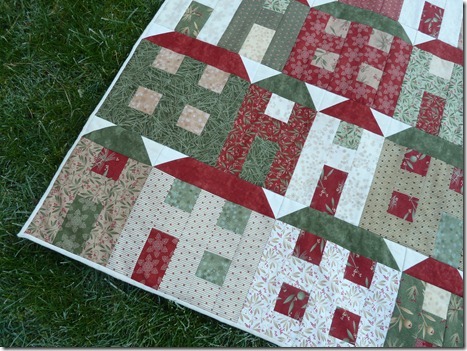
The pattern’s called The House That Jack Built, and consists of three different house blocks. I decided to do all the roofs in red and green, and mix up the colours for the houses. But at that point I hadn’t leant the tricks to make piecing quicker, and it took me ages to do six blocks, at which point I put it all in a bag and left it there.

P3209819

I also wasn’t sure what I was going to do with the quilt once I’d done it, but last weekend I remembered about it and decided to just crack on with it regardless. It only took me a couple of evenings to do the rest of the houses, and I laid them out to make sure I’d got a reasonable mix of colours, before thinking about what to use for the sashing and borders. But the more I looked at the houses laid out on the floor, the more I liked them like that, and the panel was the perfect size for a wall-hanging on my stairs, so I just sewed them together as they were.

P1040764

Because it was for the wall, I didn’t do much in the way of quilting, just four horizontal stitch-in-the-ditch lines between the rows of houses. I used calico for the backing and the binding – it’s a very narrow binding, just 1/4”, as otherwise I’d have cut off the corners of the roofs.

P1040765

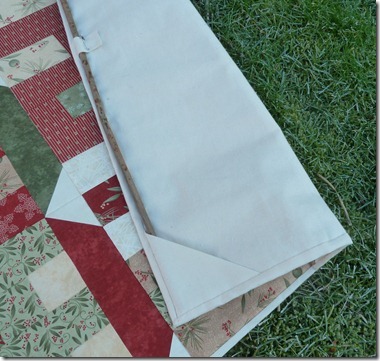
To hang it I stitched half square triangles into the corners when I sewed the binding on, and a loop in the middle – that’s just held down with a safety pin, it seemed easier than sewing it into place. I’ve just used a garden cane and a couple of nails to hang it.

P1040766

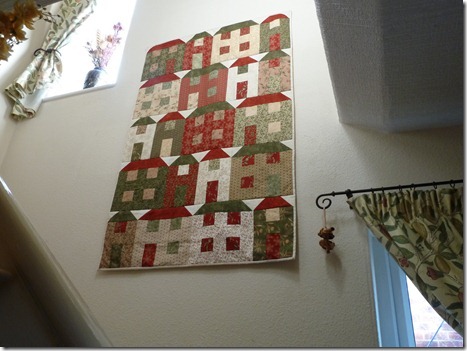
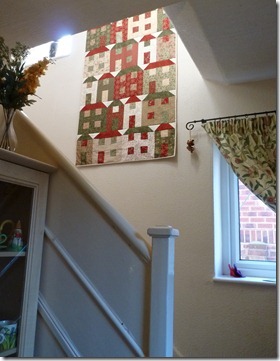
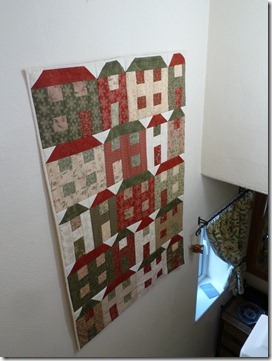
And this is how it looks in place –

P1040771

And the view from the front door – I’m really pleased with the way it fills the space there.

P1040772

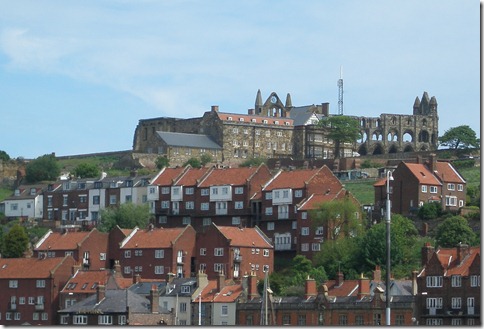
The houses remind me of those seaside towns you get on the Yorkshire coast, where all the houses seem to be on top of each other.

P5210004

Like these houses in Whitby.

P1040773

I see the quilt every time I go up or downstairs, and it makes me smile. That’s a result, I think.

Read Full Post »

A couple of days ago, I remembered about Pinterest – I set up an account on there ages ago, and made some boards and did some pinning, then forgot about it, largely because I bought an ipad and couldn’t find an easy way to pin from Safari, and because their app didn’t seem to do what I wanted it to.

But something inspired me to open the app again, and it’s lots better now. I also did some googling, and found how to add a ‘pin it’ button to my ipad bookmark bar, so I can pin things I find as I wander round the internet. I’ve gone a bit bonkers, pinning and repinning lots of things – apologies to anyone who follows me and is overwhelmed, it’ll calm down soon! I’m Minniemoll over there too, if anyone who doesn’t follow me wants to. Oh, and feel free to pin things from my blog if you want to – I know some people don’t like it, but I’m happy to be pinned!

Anyway, one of the things I found and pinned was a link to this tutorial, for an easy way to piece small squares of fabric, and yesterday afternoon I couldn’t resist sitting down and having a go. I found some scraps of the fabric I used to make flowers in the summer, and cut out 25 2” squares, five in each design. Then I cut a 10” square piece of fusible interfacing, and arranged the squares on it.

IMG_2152

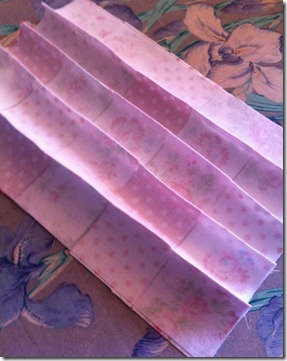
I ironed them on, then did the first row of seams, just folding the fabric right sides together at every join.

IMG_2154

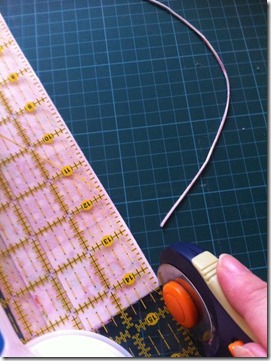
I trimmed the very edge of each seam – I started using a rotary cutter to just cut off a bit, which worked well for the edge seams, but not so much in the middle, where there was too much bulk under the ruler to hold it straight, so I used a pair of very pointy scissors instead.

IMG_2155

And ironed the seams flat. I know you usually press them to one side for quilting, but I think that would make too much bulk, with the interfacing as well.

IMG_2156

I then repeated the process with the other set of seams, and hey presto! A set of perfectly lined up squares with very little effort – just eight seams and a bit of ironing.

IMG_2157

Of course I then had to think of something to do with such a pretty thing, and a bit of digging found some offcuts of plain white fabric, so I gave it a border, attached some wadding, and quilted the border, to make the front of a cushion.

IMG_0469

Apologies for the photos above, by the way – I was snapping them on my phone, and it was a bit dark and murky yesterday.

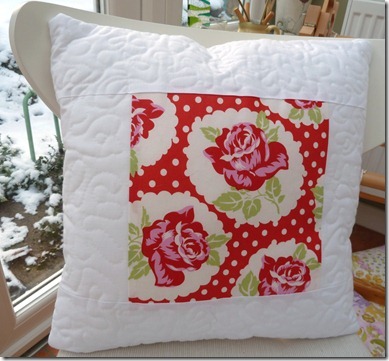
I thought I had enough plain white to make a back for the cushion, but I didn’t, so I did a similar thing, but with a single piece for the centre. Then I sewed the two halves together, leaving a gap on one side, inserted the inner, and hand sewed it closed – I thought about putting in a zip, but I couldn’t be bothered.

P1040471

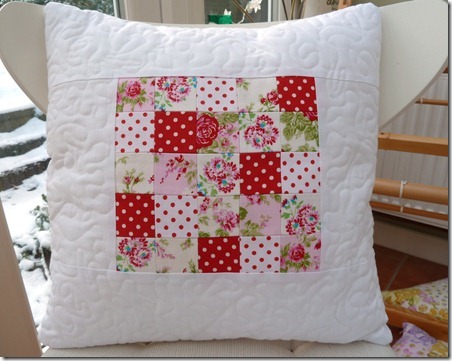
And this is the finished thing.

P1040474

P1040473

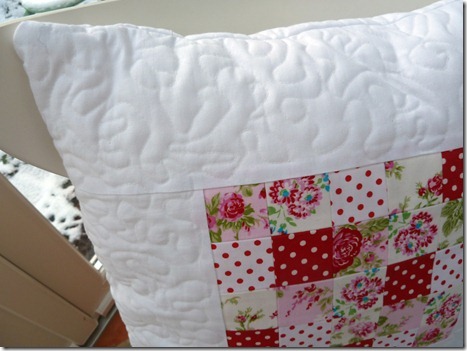
You can see the quilting on this one – I used the darning foot for my machine, lowered the feed dogs, and swirled away. It’s not perfect, but it’s not bad, and it frames the lovely panel nicely. The centre panel is 7.5” square, and the cushion is about 15” square.

Read Full Post »

Quilts for Christmas

Chickadee is all done, including the buttons, and I did have a go at photographing it yesterday, but I was tired and my hair needed a wash, so I’ve decided not to inflict those photos on you! I was going to have another go today, but it’s pouring down outside – maybe tomorrow. Here’s a quick snap to be going on with –

P1010681

I have managed to finish off the quilts I’ve been making for my nieces for Christmas though, which I’m glad about – they could so easily have been being done on Christmas Eve!

P1010696

The idea was shamelessly stolen from Jen’s lovely quilts – as soon as I saw them I thought I could do something similar for Daisy and Holly for Christmas. I was going to buy a jelly roll, but in the end I decided that actually using some of my stash would be a better (and cheaper!) plan. I bought eight fat quarters of lovely Tanya Whelan fabrics from Grace and Jacob a while ago, and I cut 2.5” strips from them. I decided to go for a green border for Daisy, and a red one for Holly (it seemed appropriate, somehow), and I laid the strips out slightly differently for each one, but the general idea was the same. For the first one I sewed the strips together one after the other, but for the second I made blocks of four strips, then sewed the blocks together, which was easier to manage.

P1010689

Next I added a 4” border of a plain white cotton, and then I made my first foray into the world of free motion quilting, using my darning foot. It was great fun, even if it’s not as even as it could be – the second quilt was better though, as I got used to it. I used gloves with rubbery fingertips which made it much easier to move the fabric about, and did the centre section first, then the edging.

P1010694

I was very pleased with myself for thinking of adding their names to the edging! I drew them on with a disappearing ink pen, then carefully sewed over the lines – it wasn’t so easy as the completely random stuff, but they’ve not come out badly.

P1010690

I had a bit of trouble with the bindings – for baby quilts that are likely to be washed a lot, I wanted to sew the binding by machine rather than by hand, so instead of heming it on the reverse, I sewed through both layers. For the green one I sewed on top of the binding on the right side, but it did miss a few bits on the reverse, and the red one was worse, for some reason. I painstakingly undid the whole lot and did it again, stitching in the ditch this time, but I’ve still missed a few bits – I’ll sew them by hand, I’ve had enough now!

P1010693

The back shows the quilting better than the front.

P1010691

But the fronts are pretty! The quilts are about 30” by 40”, so about cot sized, but I’m thinking they’ll be useful for playing on, or for Daisy to cover her dolls with (she’s very fond of putting her dolls to bed, then tucking them up, heads and all).

Read Full Post »

P1000395

It’s done! I was planning to leave it until Sunday (that being the next day there’s no tennis on…) but my spray glue arrived yesterday (very impressive, since I only ordered it on Sunday), and after I’d spent the day looking at it, I couldn’t resist having a play with it last night. I was only going to stick the layers together, but then I just had a go at sewing one line of quilting, then another, and suddenly it was 10 o’clock and I’d done it all.

It would have been easier if the special quilting gloves with rubber fingers to help move the fabric through the machine had arrived as well, but they’re on back order. The glue definitely helped though, and was much easier than trying to pin all the layers together. I did put a few pins round the edges, just to make sure, but I don’t think I really needed them.

P1000394

I trimmed the edges and threw it on the sofa to see how it looked, and within seconds Mollie had given it her seal of approval.

P1000398

Before I went to work this morning I did the binding, with proper mitred corners and slanted joins, and I’m very pleased with it.

P1000406

The back’s a bit rippled, I did think of ironing it flatter, but I actually quite like the effect of it, so I’ve left it. There were a couple of points where the fabric on the back got a tuck in it – one was at the edge, so I fixed it, but the other was in the middle, so that’s still there. I think if I’d spent more time making sure the backing fabric was completely flat on the floor before spraying the glue on it might have been better. Actually ironing it mightn’t have gone amiss either. Hey ho, you live and learn.

P1000410

I do like the backing fabric, it’s the same as the one I used for the cushions.

P1000404

And here’s everything together – in all I used two charm packs, half a metre of the two border fabrics, a quarter of a metre of the binding fabric, and about a metre and a half of the backing fabric. All the fabrics are from Moda’s Mill House Inn range.

The quilt’s not perfect, but I’m pleased with it for a first attempt. I don’t think that quilting will ever take the place of knitting in my affections (it’s all a bit tedious, and you can’t watch television whilst you do it) but I did enjoy making it, and I’ll definitely do another at some point. I’d better, I’ve got an awful lot of fabric to get through!

Read Full Post »

More sewing

P1000373

I carried on with my sewing yesterday, and turned the two squares I pieced last week into cushion covers. I quilted the fronts by stitching in the ditch again, but I didn’t use a backing fabric this time, I just sewed the wadding to the fabric. I think I’m regretting this already, I can see problems if I need to wash the cushion covers, I’ll just have to be careful of them!

P1000376

Here’s a close up of the quilted squares, you can just see the lines of stitches between them. I’m not 100% happy with this method to be honest, it looks as though you’ve tried to hide the stitches but not quite managed it, even when they’re right up to the seam. I’ve got my eye on a darning foot for my machine on ebay at the moment, if I win it I’m going to have a go at free-motion quilting. Or I might just see if Kerri has one of those too…

P1000374

For the last cushion covers I made, I put a zip along one side, but sod’s law says that that is the side which always ends up on top, so I did a button back for these ones. It was a bit more fiddly, but I do like the way it looks. And I have lots of buttons but no zips, so it was economical too.

Read Full Post »

Saturday Sewing

P1000360

I seem to have spent most of the day sewing without having a day’s worth of sewing to show for it. Hmm, perhaps there was some thinking time in there too. And I did read (well, skim) some quilting books too.

P1000367

I started by sewing borders onto the quilt top I made last week. But then I googled for instructions on quilting, found this useful blog post, and decided that her advice to use spray adhesive to hold the layers together sounded much easier than trying to pin them, so now I’m waiting for it to arrive in the post.

P1000352

So to practice machine quilting in the meantime, I sewed a border onto the two small squares I made last week, then got out the scary-looking walking foot Kerri lent me.

P1000354

It actually isn’t as scary as it looks, although the instructions on how to attach it left something to be desired. But I got there, and had a go at stitching in the ditch (like everything else, quilting has its own language, this one means doing a line of stitching along the joins between your fabric.)

P1000355

And before long I had this. I used a backing fabric, though it wasn’t strictly necessary for the bag I was planning, but I wanted to see how it worked.

P1000357

I did the same with the other side, then sewed them together and mitred the corners (the purple line was nearly a disaster, as I completely forgot how to mitre corners, and sewed across the corner with the fabric flat – thankfully I turned it the right way out to admire it before I cut the corner off!)

P1000358

It looked a bit messy from the inside, but the outside was taking shape.

P1000359

P1000362

Mollie supervised as usual.

P1000365

I made a couple of quilted handles and a button loop, and sewed them in place before I sewed the lining in (I somehow forgot to take a photo of the lining process, but basically I made another bag the same, but with one of the corners not sewn up, put the main bag inside it, sewed round the top, pulled it the right way out through the inside corner, and topstitched round the top edge.)

P1000368

And voila! A quilted bag.

P1000370

In other news, I finished the spinning I mentioned the other day.

P1000371

210g of aranish weight merino silk blend. I’ve not measured the length yet, but there should be enough for a nice cowl for the winter.

I also finished the green top I was making, but I’ve not got round to taking photos yet – maybe tomorrow if it’s not raining!

P1000372

And I’ve swatched for my new project – the Corinne cardigan from Knitty, in some Debbie Bliss Cotton Cashmere that’s been lurking in my stash for several years. It should be ideal Wimbledon knitting – lots of garter stitch!

Read Full Post »

I’ve had a bitty week, craft-wise. There’s been knitting, sewing and spinning going on, so I have several things on the go but nothing actually finished. But there’s a few nearly there :)

P1000346

The main thing on the go is the Louisa Harding top I’ve been knitting on for the last fortnight or so. It’s blocking now, ably assisted by Mollie as usual (why would she find wet cotton good to sleep on? Cats can be very odd). Actually I think it’s pretty much dry now, so I might sit in the sunshine, which has come back, and not before time, and sew it up. Or I might get on with my spinning.

P1000348

This is 200g or so of merino/silk blend from Winghams, which I’ve been spinning a bit half-heartedly for the last few weeks, but it’s nearly done, and really just needs plying. It should be about aran weight with any luck, which is probably why I’m not really enjoying it – my fingers automatically try to make thinner  yarn, I’m having to be very strict with them!

P1000350

I spent Sunday playing with a couple of Moda charm packs, in the Mill House Inn pattern, and sewing them into various shapes. The big piece is going to be a smallish quilt for the sofa, I’m just waiting for fabric for the borders and backing to arrive, and to go and buy some wadding. And for the walking foot my friend Kerri is very kindly lending me to arrive, then I can have a go at machine-quilting it.

The medium pieces are for two cushion covers, and the small ones are going to be a little bag (it was all I could think of to do with the eight pieces I had left over!)

P1000351

I needed some easy knitting to do whilst watching the tennis final from Queen’s yesterday, so I’ve started a simple baby blanket, using the lovely Sirdar Simply Recycled I bought a few weeks ago. I’m not sure who it’s for, but there are three babies due in the next few months (including another niece for me), so it’ll be for one of them. There are borders to be knitted on. I should save it to knit during Wimbledon, but it’s so easy to knit I can see it being done before then. It’s amazing how much nicer to knit with this cotton is compared to the Debbie Bliss Amalfi.

P1000347

Oh, and one finished thing – a cute patch for the tear in the knee of my gardening jeans :)

Read Full Post »