You may (or may not!) remember a post I made a few weeks ago, about a cushion I’d made using a new-to-me method of piecing small squares accurately, using iron-on facing – the tutorial I used can be found here. The tutorial talks of facing with a 2” grid marked on it, and I eventually managed to track some down in the UK, which wasn’t easy, as not many places stock it, and then had a play with it.
I found five fat quarters from the same range in my stash, and cut them into lots of 2” squares, then started making layouts of 7 x 7 squares (that being the width of my ironing board, so easy to do…!)
I completely failed at taking any sort of progress shots, this is the only one I managed, of the first square. This time I didn’t trim the seams and iron them flat, I simply pressed them to one side, then sewed the seams in the other direction, so there’s only twelve seams per block. You can see the lines of the seams a bit, but that would be eased by making the squares ever so slightly less than 2”, as in places they overlap, which adds bulk to the fold of the seam. I’ll try and remember for next time!
So I made nine blocks, then found an old duvet cover and cut strips of it to make sashing and binding, before backing it with calico for cheapness sake – this was really only me seeing how the blocks behaved in a quilt. With hindsight I’d have been better off using quilting fabric for the sashing, the duvet cover is pure cotton, but it had been washed quite a few times, so it’s lovely and soft, and contrasts rather too much with the stiffer blocks. But it’s not bad, I’d use this method again for quickness and accuracy.
And this is the finished thing. You can see the sashing rippling slightly.
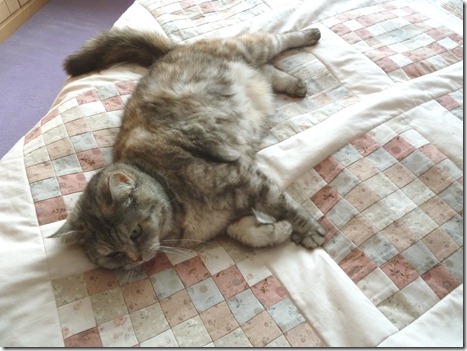
I decided to put it over the end of my bed, to try and keep the cat hairs contained.
Mollie loves it.
Minnie had a go at lying on it, but really prefers to find the one bit of my bed it isn’t covering, so she can make it nice and hairy. Little minx.
I just stitched along the seams of the sashing to quilt it. I machined sewed the binding on, from the front, which was only partially successful – I managed to miss the edge in a few places. I think that technique may need refining!
It’s funny, but the patterns in the blocks show up much better on photos than they do in real life.
I’d used most of the 2” squares I’d cut, but there were a few left over, as well as a few that weren’t quite 2”, and I remembered another tutorial I’d found on Pinterest, to make a cover for a notebook. I again ironed the squares onto facing, in strips this time, and sewed the seams, then inserted them between pieces of calico, added some stiff facing, and ended up with this.
Which makes a very ordinary A4 hardbacked notebook look much nicer.
This is the back – you can see the dark blue boards slightly at the edge, which is a shame, but again it’s worse on the photo.
It has pockets to hold it on.
And there’s top stitching next to the pieced strip.
So there you go – it’s amazing what you can make with five fat quarters, an old duvet cover, facing, and some calico!


